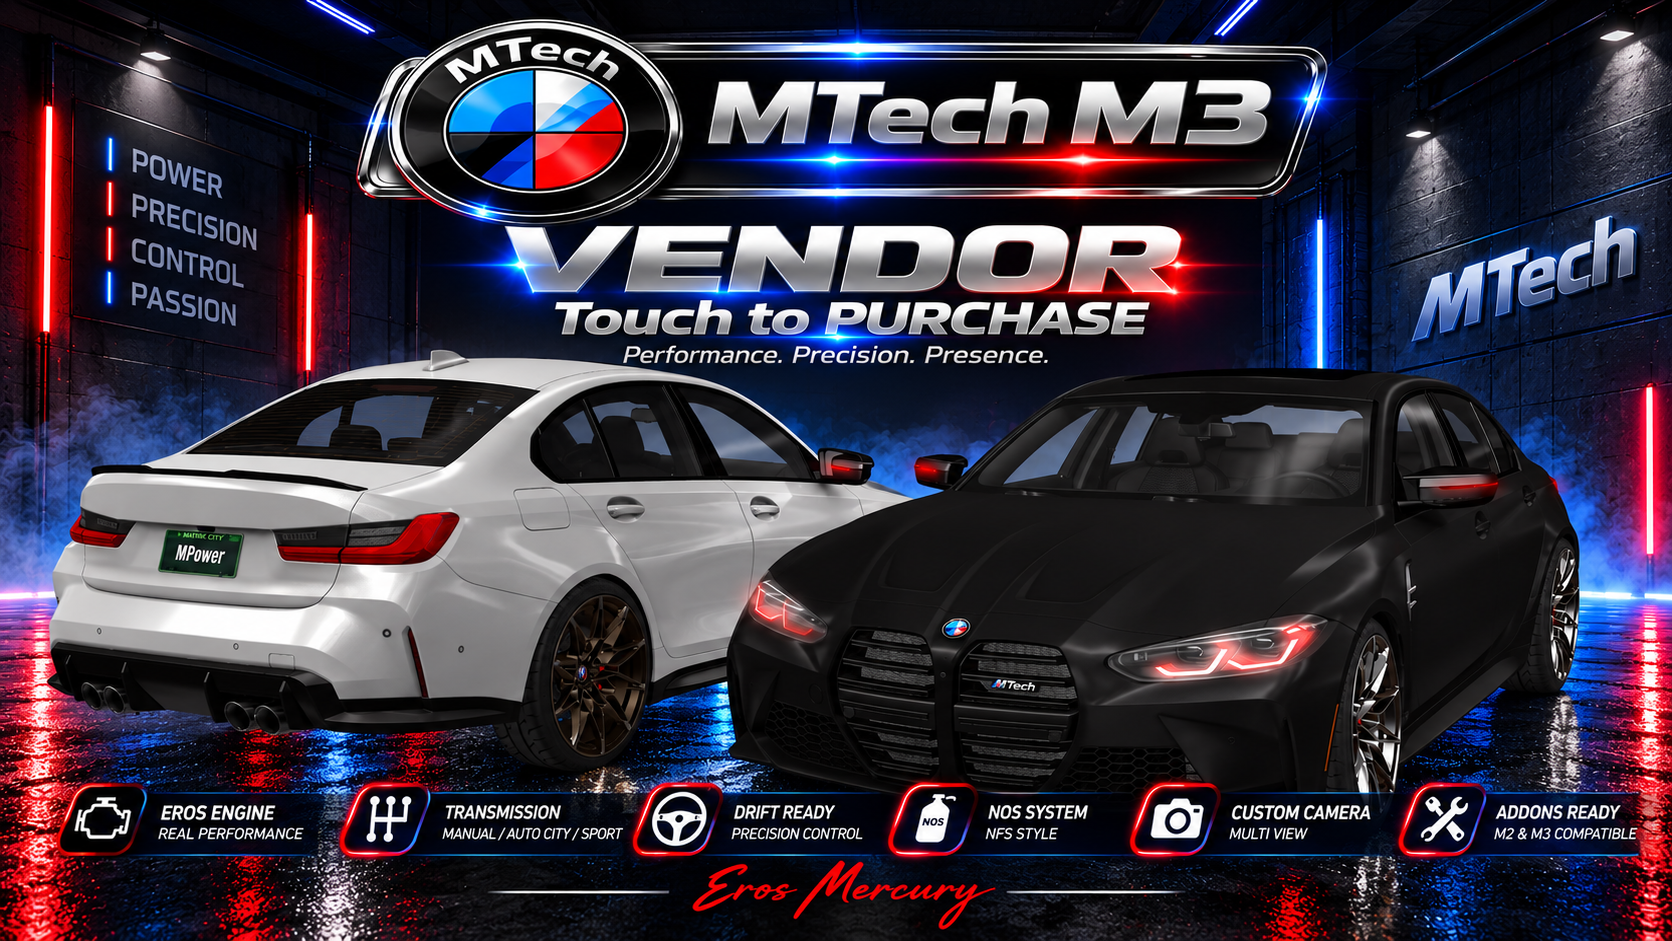
Official MTech owner guide • MATRIX City / Second Life
MTech M3 Competition
Full Vehicle Manual
Advanced EROS Engine physics, M1/M2 performance, Manual / Auto City / Sport, Launch Control, NOS, Drift, HUD, Mods & Roleplay Systems.
M3 CompetitionPerformance & RealismDriver + Owner ManualTable of contents — 43 chapters
- At a glance — what the M3 offers
- 1. Quick start — your first drive
- 2. Driver controls — quick reference
- 3. Understanding the M3's physics
- 4. M1 and M2 — engine performance profiles
- 5. Engine startup, shutdown, and sound
- 6. Gearbox — Manual, Auto City, and Auto Sport
- 7. Manual driving — getting the most from RPM
- 8. Launch control — W + S
- 9. Burnouts
- 10. Drift physics — how the car behaves
- 11. Handbrake and drift controls in keyboard mode
- 12. Mouselook driving and handbrake
- 13. Donuts, oversteer, and recovery
- 14. NOS — NFS-style boost system
- 15. NOS troubleshooting
- 16. Steering configuration
- 17. Camera controls — all inside Settings
- 18. Choosing keyboard or mouselook driving
- 19. Seat adjustment
- 20. Lights, indicators, and horn
- 21. Lock, access, and drive-away locking
- 22. RP Alarm and vehicle theft roleplay
- 23. GPS theft alerts and recovery
- 24. Vehicle health and damage
- 25. Broken-vehicle behavior
- 26. Repairing the M3
- 27. Collision and crash realism
- 28. Vehicle HUD — what it controls
- 29. Auto-attaching and syncing the HUD
- 30. Skin & Color HUD
- 31. Installing addons, wheels, and custom parts
- 32. Shared M2 / M3 addons — compatibility
- 33. Scale system
- 34. Why Reload matters
- 35. Everyday driving recommendations
- 36. Performance driving — a practical progression
- 37. Troubleshooting — driving and controls
- 38. Troubleshooting — addons and HUDs
- 39. Troubleshooting — damage, repair, and RP
- 40. Owner checklist — before contacting support
- 41. Frequently asked questions
- 42. Final reminders
Welcome to the MTech M3 Competition Full Vehicle Manual. This is the complete owner’s guide to driving, configuring, customizing, securing, and repairing your MTech M3 in Second Life.
The M3 is designed to reward a driver who understands throttle control, RPM, braking distance, steering input, shifting, weight transfer, traction, and timing. It is not an instant-stop, instant-turn arcade vehicle. From a relaxed cruise in Auto City to an aggressive launch in M2 performance mode, the driving experience changes with your inputs.
Important: MTech is the vehicle’s identity. This manual refers to the MTech M3, not an official vehicle produced by another manufacturer. Physics and performance are simulated inside Second Life and depend on simulator conditions.
At a glance — what the M3 offers
- EROS Engine with responsive RPM, engine braking, acceleration, and engine-sound behavior.
- M1 / M2 performance tuning: M1 for smoother power delivery; M2 for a more aggressive response.
- Manual gearbox plus automatic City and Sport transmission profiles.
- Reworked steering and grip physics, with progressive steering, lateral momentum, controlled oversteer, drifting, donuts, and traction recovery.
- Launch control using W + S while stationary, with a staged RPM hold and responsive release.
- NFS-style NOS system with timed usage, cooldown, and rechargeable bottle status.
- Keyboard and mouselook driving, including dedicated handbrake/drift inputs.
- Camera presets and fine adjustments, accessible under Settings → Camera.
- HUD support, mod installation, wheel/skin/addon customization, security, theft RP, vehicle damage, and repair.
1. Quick start — your first drive
- Rez your MTech M3 in an area where vehicles are permitted, with enough space ahead of it.
- Sit in the driver’s seat.
- If automatic engine start is enabled, the engine starts when an authorized driver sits; otherwise use Engine → Start.
- Open Gearbox from the vehicle’s main menu and choose your driving preference: Manual or Auto. If you choose Auto, select City or Sport.
- Select M1 if you want smoother response while learning the vehicle.
- Use W / Up Arrow to accelerate and S / Down Arrow to brake. In keyboard mode, A / D steers.
- Begin on a clear road, learn the braking response and gear behavior, and then explore M2, Sport, drifting, and NOS.
For new drivers: M1 + Auto City + keyboard driving is a sensible place to start.
2. Driver controls — quick reference
| Input / Control | Function |
|---|---|
| W / Up Arrow | Throttle / accelerate |
| S / Down Arrow | Brake / decelerate |
| A / D in keyboard mode | Steer left / right |
| Shift + A / Shift + D in keyboard mode | Handbrake-assisted drift entry in the chosen direction |
| Mouse direction in mouselook mode | Steer the vehicle |
| A / D in mouselook mode | Handbrake / drift initiation while the mouse controls steering |
| W + S, while stopped | Stage launch control / brake-throttle launch |
| Gearbox controls / selector | Select Manual or Auto; use the configured shifting controls in Manual |
| NOS controller / assigned control | Activate the NOS burst when charged and available |
| Vehicle menu or HUD | Engine, lights, horn, access, settings, and other vehicle functions |
Mouselook note: Second Life’s LSL input handling cannot reliably identify Shift alone as a separate handbrake press in this setup. Use A or D to request handbrake drift in mouselook; Shift + A/D is the keyboard-mode combination.
3. Understanding the M3’s physics
The EROS Engine combines engine output with how the vehicle moves across Second Life terrain. These are simulated driving behaviors rather than a claim of exact real-world vehicle telemetry.
Acceleration and RPM
Acceleration is not meant to be the same at every speed. Lower gears give stronger initial pull; higher gears carry speed over a longer range. RPM responds to load, throttle, gear choice, and movement. The vehicle may feel different coming out of a slow corner than on a long straight.
Momentum and braking
The car has momentum. Releasing the throttle does not instantly stop it, and hard braking from speed requires room. Engine braking is part of the driving feel. Begin braking before the corner, then steer and apply throttle as the car is ready to accelerate out.
Grip and traction
The rear wheels can lose traction under demanding acceleration or deliberate drift inputs. Lateral momentum matters: when a slide starts, simply releasing a key does not necessarily cancel all movement. Correct with steering, throttle, and time.
Progressive steering
Steering is tuned to offer useful low-speed maneuvering without making high-speed micro-corrections excessively abrupt. Smooth, brief steering inputs are generally more stable than holding maximum steering at high speed.
4. M1 and M2 — engine performance profiles
The MTech M3 has two engine performance profiles. These are driving tunes, not two different car models.
M1 — controlled performance
M1 focuses on smoother, more progressive acceleration. It is particularly suited to everyday driving, learning the vehicle, and maintaining a comfortable rhythm in traffic.
M2 — aggressive performance
M2 offers stronger, sharper acceleration response, useful for performance driving and confident exits from corners. It requires more care with traction and braking.
You can change the available tune through the Engine / performance controls in the vehicle or its paired HUD. As on the earlier MTech system, live tune changes should be made while the engine is running.
Important distinction: M2 performance mode on the M3 is not the same as owning an MTech M2 vehicle.
5. Engine startup, shutdown, and sound
Open the vehicle’s Engine menu for the available engine functions.
- Start: start the engine manually.
- Stop: stop the engine when parked.
- Auto Engine: where enabled, start the engine when an authorized driver sits.
- M1 / M2: switch the performance profile.
The sound system follows the vehicle’s modeled RPM behavior. Expect changes in engine note as throttle load, RPM, and gear selection change. Higher gears and high-speed cruising should feel acoustically different from a hard low-gear acceleration.
Tip: If audio seems stuck at one RPM note, or if steering stops responding temporarily, check simulator script performance and whether the vehicle scripts are operating normally. Persistent pauses are not an intended driving feature.
6. Gearbox — Manual, Auto City, and Auto Sport
Open Main Menu → Gearbox. This is the driving transmission selection area.
| Mode | Driving character | Best use |
|---|---|---|
| Manual | You choose when to shift using the vehicle’s configured shift controls. | Full driver involvement, performance practice, personal shift timing. |
| Auto City | Earlier, calmer shifts intended for smooth everyday driving. | Traffic, cruising, learning the car. |
| Auto Sport | Holds the engine in a more performance-oriented range and responds more aggressively. | Faster driving and performance-focused sessions. |
When first selecting Auto, City is the relaxed default. You can switch between City and Sport using the Gearbox selection.
Gears, reverse, and neutral
The drivetrain includes Reverse, Neutral, and forward gears. The effective shift behavior and available gear count follow the engine/controller version installed in your car. Reverse is protected against unsafe selection while moving at speed.
What automatic mode does during maneuvers
Automatic shifting is designed to avoid fighting a driver who is deliberately losing grip. During active drift, burnout, or related GRIP maneuvers, normal automatic shifting can be temporarily suspended or adjusted to protect the maneuver.
City vs Sport changes shift strategy; it does not replace M1 or M2 engine tuning. You can use the desired engine tune with a suitable gearbox preference.
7. Manual driving — getting the most from RPM
Manual shifting rewards attention to the engine. You can hold a lower gear for acceleration, upshift for a sustained straight, and downshift when more power is needed at lower speed.
- Avoid constantly bouncing against the RPM limit.
- Choose the gear before a demanding corner whenever practical.
- Keep the engine in a usable range when attempting to drift.
- For smoother driving, shift in a controlled rhythm rather than waiting until the last possible instant.
- Never use reverse as an emergency braking technique.
The exact shifting input depends on the installed gearbox control layout; use the gear controls supplied with the vehicle or HUD.
8. Launch control — W + S
The M3’s launch control uses a brake-and-throttle staging technique designed to launch quickly from a stop without immediately spinning the wheels uncontrollably.
How to perform a launch
- Bring the vehicle to a complete stop on a clear, open surface.
- Select a forward driving gear or the appropriate automatic drive setting.
- Hold W + S together to stage the engine.
- Allow RPM to build and settle near the programmed launch target, approximately 70% of the engine’s upper RPM range in the current tuning.
- Release S while keeping W applied to launch.
- Keep the car pointing straight and correct smoothly if traction breaks.
The configured launch system also includes an enhanced launch-force response while the W + S staging input is held. Actual acceleration and wheelspin depend on the car setup, road surface, simulator timing, and driver inputs.
Do not try launch control at speed. It is designed for stationary starts.
9. Burnouts
A burnout deliberately breaks driven-wheel traction. On compatible setups the MTech system supports brake-throttle and neutral-to-first-gear burnout techniques.
Standing burnout
- Start from a safe, stationary position.
- Select first gear in Manual.
- Hold W + S and manage the throttle/brake interaction.
- Observe whether the vehicle holds a controlled launch or begins a wheelspin maneuver in the current grip setup.
Neutral-to-first technique
With a manual gearbox and suitable traction conditions, rev in Neutral and engage first while maintaining throttle to attempt a more aggressive wheelspin entry. Use this only in an open practice area.
Launch control and burnout are related inputs, but they are not the same objective. Launch control tries to transfer power efficiently; burnout deliberately overwhelms grip.
10. Drift physics — how the car behaves
Drift is not a switch that makes a car slide at any speed. In the M3 it emerges from speed, RPM, steering angle, throttle, grip, weight transfer, and driver correction.
A drift normally has three parts:
- Entry: approach with a suitable speed, turn in, and intentionally unsettle rear-wheel grip.
- Control: balance throttle, steering, and countersteer while lateral momentum carries the vehicle.
- Recovery: unwind the steering and moderate throttle as grip returns.
The M3 handling model aims to retain lateral movement, countersteering behavior, and gradual traction recovery rather than artificially snapping a slide away the instant you release a key.
A first drift exercise
Choose a wide, empty practice area. Begin in a lower gear, build a moderate speed, steer into a gentle curve, apply a brief handbrake-assisted entry, then use modest countersteer and throttle to catch the slide. Practice the recovery first; adding speed comes later.
11. Handbrake and drift controls in keyboard mode
Use standard keyboard driving if you prefer precise left/right steering inputs.
- A / D: regular steering.
- Shift + A / Shift + D: handbrake-assisted drift request in the direction of the turn.
- S: normal braking.
An overlong handbrake entry may scrub too much speed or rotate the car more than expected. Short input, timely throttle, and measured countersteer usually produce better results.
12. Mouselook driving and handbrake
In mouselook, your viewing direction guides the steering. The goal of the updated driving model is to preserve the same underlying grip and drifting behavior available with keyboard steering.
- Move the mouse: choose steering direction.
- A / D: request handbrake/drift intervention.
- S: service brake.
- W: accelerate.
Why not Shift alone? In this LSL control arrangement, Shift alone is not a reliably distinct handbrake input while in mouselook. Use A or D instead. If a viewer overrides a key combination, test the selected driving mode in a safe area before racing.
13. Donuts, oversteer, and recovery
Donuts work best at lower speeds when the driven wheels can sustain a tight rotating slide. Use first gear where appropriate, start from a small burnout or low-speed drift, turn strongly, and regulate the throttle. Avoid doing them near parked vehicles or avatars.
If the rear of the car swings farther than intended:
- Reduce abrupt throttle inputs.
- Countersteer toward the intended path instead of adding more steering lock.
- Give the car time to regain grip.
- Use gentle braking when needed, but avoid panicked full-lock steering at speed.
A controlled recovery is part of the handling challenge.
14. NOS — NFS-style boost system
The MTech NOS controller adds a short performance boost with a charge/recharge cycle and visual status messages. It is not unlimited boost.
How NOS works
- The bottle is charged to 100% for a full available boost cycle.
- Current controller timing is designed for approximately 6.5 seconds of boost use per full bottle.
- A cooldown of roughly 6 seconds applies after use, subject to the active controller state.
- Recharge from empty to full takes approximately 60 seconds.
- Charging progress is shown in 20% steps, so you can see the bottle recovering.
Using NOS correctly
- Make sure the vehicle is moving under control and the NOS controller shows a usable charge.
- Activate NOS using the supplied NOS control for your vehicle setup.
- Keep a safe line ahead: the car will gain acceleration while the effect is active.
- Allow the controller to end the burst and complete its cooldown/recharge cycle before expecting another full burst.
The NOS display is meant to announce recharge milestones and readiness when a recharge finishes, not repeat a full-bottle readiness announcement every time you sit in the car.
Driving advice: Use NOS when the wheels have usable traction and there is enough road ahead. Boosting into a tight corner or during an unstable slide can make recovery more difficult.
15. NOS troubleshooting
NOS does not activate: check charge, active cooldown, engine state, and the control assigned in your package.
The bottle says it is recharging: allow the recharge cycle to finish. A partially charged display is not necessarily a full new burst.
Visual bottle or color appears stuck: stop the current NOS action, allow the controller state to reset, and use the supplied vehicle reset/reload workflow if needed. If the issue persists, contact the creator with the controller version and a description of what occurred.
A readiness message appears on every sit: this is not the intended updated status behavior; check that the latest NOS controller is installed.
16. Steering configuration
Open Settings → Steering for the available steering-response adjustments.
- Softer settings suit drivers who prefer slower correction and smoother inputs.
- Sharper settings provide quicker response but can demand more control at speed.
- The default or balanced setting is a good starting point while learning the physics.
The intention of the updated steering design is to maintain responsive small corrections without sudden extreme lock as speed increases. Practice first before selecting the sharpest available setting.
17. Camera controls — all inside Settings
Open Main Menu → Settings → Camera.
The camera system provides five camera presets and the available fine adjustments:
- Preset 1–5 to select a starting camera viewpoint.
- Near / Far to change follow distance.
- Up / Down to adjust the camera’s vertical position or angle.
- Turn Left / Turn Right to change horizontal view alignment.
- Center to return alignment toward the intended center viewpoint.
Important: Camera controls belong inside Settings → Camera. They are not duplicated as a Camera option on the first menu. Camera configuration is separate from your keyboard-versus-mouselook driving preference.
18. Choosing keyboard or mouselook driving
Find the driving-input preference under Settings → Driving where available in your menu configuration.
Keyboard: best when you want discrete steering inputs, familiar A/D steering, and handbrake-assisted drift with Shift + A/D.
Mouselook: useful for drivers who prefer pointing the view to steer. Remember to use A/D for handbrake intervention rather than expecting Shift alone to behave as a separate handbrake.
Start with keyboard mode to learn braking, gear changes, and grip behavior; then try mouselook if it better suits you.
19. Seat adjustment
Use Seat Adjust from the vehicle’s available menu location to position the driver in the cockpit.
The seat-adjustment controls work across X, Y, and Z offsets; save a comfortable seating position and restore defaults if you lose alignment. Adjust the seat while parked, not while driving at speed.
20. Lights, indicators, and horn
Open Lights from the main vehicle menu or use the paired vehicle HUD.
Available lighting functions include Off / On / Auto, left and right indicators, hazard lights, and indicator reset. Auto lighting responds according to the vehicle’s configured logic.
Use the horn through the menu or vehicle HUD. Indicators and hazards support normal traffic RP and make your intentions clearer to nearby players.
21. Lock, access, and drive-away locking
The standard lock system controls who can use the vehicle. Access settings may include Owner, Group, and Anyone, depending on how the vehicle is configured.
The established MTech access design includes a runtime auto-lock around 25 km/h to prevent additional avatars from entering while the car is moving. This driving lock is separate from the car’s saved access preference and is cleared when the driving session ends.
A lock protects normal access. It is not the same as the RP Alarm system below.
22. RP Alarm and vehicle theft roleplay
The RP Alarm is an optional roleplay security layer, separate from regular vehicle access. In the MTech RP workflow, an armed alarm allows a criminal to attempt a timed vehicle hack instead of bypassing the system instantly.
The established workflow is:
- The vehicle’s RP Alarm is armed.
- An unauthorized participant starts the supported hacking interaction.
- They remain approximately 3 meters from the car for the 5-minute hack.
- While the hack is active, the car can sound an alarm/horn and flash its lights.
- Walking too far away cancels the attempt.
- After a successful hack, the vehicle can be taken temporarily for RP until the owner restores security.
Follow the MATRIX City roleplay rules. The alarm system supports scenes; it does not authorize bypassing local RP requirements.
23. GPS theft alerts and recovery
On the established RP Alarm system, a successful hack triggers a GPS location alert to the owner, with a repeating alert approximately every 30 minutes until the vehicle is recovered and security restored.
You can use the location information in RP to involve police, organize a pursuit, or stage recovery. Once the car is back, use the supported security-restoration process to end the hacked state.
24. Vehicle health and damage
The established MTech MLS-compatible damage system uses 100 maximum vehicle health.
- 100 HP: healthy vehicle.
- Below 100 HP: damaged; repair may be available.
- 0 HP: broken / disabled.
Depending on the enabled vehicle damage integration, damage may be received through collisions, MLS vehicle impacts, weapons, or other compatible systems. Weapon hit detection and actual vehicle damage are separate functions: an impact notification alone does not necessarily prove the vehicle lost HP.
25. Broken-vehicle behavior
When vehicle health reaches zero, the damage system is designed to enforce a disabled state:
- the engine fails;
- the vehicle stops responding to normal drive controls;
- smoke can appear;
- vehicle physics and driving are disabled;
- further driving is blocked until repair.
Do not drive away from an RP crash just because the vehicle’s exterior still looks intact. Follow the damage status and scene rules.
26. Repairing the M3
When health is below 100, touch the car and select REPAIR, where supported by your installed damage system.
The standard MTech repair workflow uses a 300-second full-repair reference and a required proximity of approximately 4 meters. Repairing can pause if you walk away and resume when you return.
In MATRIX City, a mechanic-role restriction can apply: if a valid mechanic is nearby, the mechanic performs the repair; when none is nearby, the system may allow another player to repair. This specific profession restriction is part of the city’s RP implementation.
27. Collision and crash realism
Vehicle impacts are not merely visual effects. The established crash integration can damage vehicles and avatars.
- Avatar impacts from around 20 km/h or above may cause damage when the relevant integration is enabled.
- Passengers in the impacting car are protected from its own configured crash-damage effect.
- Vehicle-to-vehicle damage can use relative impact speed, not just one vehicle’s displayed speed.
Drive with extra room around avatars, buildings, and other vehicles. Sim performance and object physics can affect collision outcomes.
28. Vehicle HUD — what it controls
The separate MTech vehicle HUD gives quick access to common vehicle functions, which can include:
- Engine Start / Stop.
- Main vehicle Menu.
- Horn.
- Lights and indicators.
- Hazards.
- Performance profile control, such as M1 / M2, on the relevant HUD version.
The HUD is a shortcut to vehicle systems, not a replacement for Settings or the Gearbox menu.
29. Auto-attaching and syncing the HUD
The vehicle supports an auto-attach workflow on equipped versions. If auto-attach is enabled, the MTech vehicle HUD can attach when you begin using the car.
If auto-attach is off, wear the HUD manually from the product folder. If controls stop working after a reload, reattachment, or region crossing, open HUD → Sync to pair with the correct active vehicle again.
Keep only the intended vehicle paired when you have several MTech cars nearby.
30. Skin & Color HUD
The separate [MTech] Skin&Color HUD supports the car’s visual customization. On the shared MTech HUD design, it requires the owner to remain within approximately 5 meters of the supported vehicle.
Available functions can include:
- custom Skin UUID entry;
- built-in skin presets;
- DIY body color;
- front light color;
- seat-side accents;
- cockpit trim and specular effects;
- supported brake/caliper color elements.
The exact list of available appearance presets depends on the vehicle pack and installed skin HUD version. Use the HUD included with your MTech M3 rather than assuming every M2-only texture applies to the M3 body.
31. Installing addons, wheels, and custom parts
Critical rule: Set the car to Scale → Normal (1.00) before installing mods.
The shared MTech installation workflow is:
- Park the car and set Scale → Normal (1.00).
- Open Settings → Install Mod → On.
- Complete the intended supported addon, wheel, skin, or structural installation while Install Mod is active.
- Install Mod remains available for approximately 5 minutes in the established MTech setup.
- When finished, use Settings → Reload.
The timed installation mode avoids leaving installation support scripts active indefinitely and helps keep the vehicle lighter during regular driving.
32. Shared M2 / M3 addons — compatibility
The updated MTech Addons package includes items identified as compatible with both the MTech M2 and MTech M3.
Always verify the addon is marked for your car or for M2 / M3. A shared addon pack does not mean every model-specific body part or wheel position is interchangeable without its intended installer.
Do not install while scaled to SL BIG or another nonstandard scale. After changing vehicle structure, use Settings → Reload to refresh the vehicle’s synced settings and parts.
33. Scale system
The scale options include Normal and the available larger SL-oriented size option (often called SL BIG).
Normal = 1.00 is the reference for installing parts. Other scale choices may be useful for display or avatar fit, but they are not the recommended installation baseline. If addons appear misplaced, first return to Normal, reinstall or realign as appropriate, and reload.
34. Why Reload matters
Use Settings → Reload after compatible installations, wheel changes, link edits, or structural changes.
Reload allows the vehicle scripts and stored state to resynchronize with the current car setup, including addon state, scale references, linked parts, and relevant saved settings.
Do not use Reload mid-race or during a vehicle chase. Park in a safe location before resetting systems.
35. Everyday driving recommendations
For the smoothest experience:
- Start in M1 + Auto City and learn how the car brakes.
- Leave more stopping distance than you would in an arcade car.
- Avoid holding maximum steering at high speed.
- Brake before turning, then accelerate out.
- Use Auto Sport when you want a more performance-oriented automatic shift strategy.
- Switch to Manual when you want to control the engine’s usable RPM range yourself.
- Activate NOS only with enough road and stable traction ahead.
- Leave drifting and burnout practice for suitable open areas.
36. Performance driving — a practical progression
Stage 1: Learn the road
Drive at moderate speed in M1/City, concentrating on steering smoothness, braking distance, and how quickly the car settles after turns.
Stage 2: Learn the power
Try M2 and Auto Sport or Manual on a long open straight. Notice the change in response, how gears behave, and how the engine sound follows RPM.
Stage 3: Practice launches
Use a safe, empty area. Hold W + S at a standstill, allow launch RPM to settle, release S, and practice keeping the car straight without excess steering.
Stage 4: Practice controlled slides
Learn one handbrake-assisted drift entry at a time. Work on catching the slide and restoring grip before attempting long or fast drifts.
Stage 5: Add NOS carefully
Once normal driving is comfortable, practice an isolated NOS burst on a straight so you can feel its added acceleration without also managing a corner.
37. Troubleshooting — driving and controls
The car turns too sharply or feels unstable
Return the steering settings toward the balanced value, use smaller corrections, and reduce speed before corners. Check if the vehicle is still recovering from a slide.
Mouselook steering works, but the handbrake does not
Use A or D for mouselook handbrake input. Shift alone is not a reliable separate handbrake key in this LSL control setup. Check your current driving mode.
My automatic transmission shifts during a maneuver
Verify the gearbox profile and whether the vehicle is in a genuine GRIP/drift maneuver state. Auto City/Sport has its own shifting behavior; it does not always behave exactly like Manual.
W + S does not produce the expected launch
Check that the car is stationary, the engine is running, the correct drive gear is selected, and the driver has control. Launch control is not intended for rolling starts.
Steering or engine freezes for several seconds
Check simulator script performance and vehicle script health. If the engine note stays looping and inputs pause, that is a technical problem, not simulated realism. Park, make note of conditions, and contact MTech support if it repeats.
38. Troubleshooting — addons and HUDs
Addon does not detect the car
Confirm Normal 1.00 scale, Install Mod On, supported M3/M2-M3 compatibility, correct owner permissions, adequate proximity, and a Reload afterward.
Wheels or addons are incorrectly placed
Check the installation scale and model-specific positioning. Reinstall or realign using the supplied installer, then reload.
Skin & Color HUD finds no supported vehicle
Stay within the supported range, ensure you own the car, use the correct HUD version, and pair with the intended MTech M3.
Vehicle HUD is attached but does nothing
Use HUD → Sync. If necessary, reattach the proper HUD included with the vehicle and ensure the correct car is active.
39. Troubleshooting — damage, repair, and RP
Repair does not start
Health must be below 100, the repairer must be near the car, and any mechanic-role rule must allow the action.
The car registered a weapon hit but did not lose health
Hit notification and actual damage processing are distinct. Verify the active MLS-compatible vehicle-damage integration and report the event to the support team; do not assume a chat message proves HP was deducted.
A hacking attempt cancels
Make sure the RP Alarm is armed, the participant stays within range, and the full timed interaction is completed under the current RP rules.
The car seems broken after a region crossing
Stop safely, allow the sim to settle, confirm engine and controls, and re-sync the HUD if necessary. For persistent problems, re-rez or reset the vehicle only when safe and appropriate.
40. Owner checklist — before contacting support
Prepare the following information if something does not work as expected:
- MTech M3 version, if displayed by the vehicle.
- Whether you are using keyboard or mouselook.
- M1 or M2 engine mode.
- Manual, Auto City, or Auto Sport gearbox mode.
- The relevant step or control that fails.
- Whether the issue happens always or only in busy regions / during crossings.
- Any script error or local-chat status message.
This makes it easier to reproduce problems without changing working sounds, steering, transmission, or settings unnecessarily.
41. Frequently asked questions
Is the MTech M3 an arcade car?
No. It is designed as a more involved Second Life performance vehicle with simulated RPM, braking, momentum, shifting, traction, and drift control.
Should I start with M1 or M2?
M1 if you want to learn or cruise smoothly; M2 when you want a stronger response and are comfortable with traction management.
Is Auto Sport the same as M2 mode?
No. Auto Sport is a gearbox shift strategy; M2 is an engine-performance profile.
Can I drift in mouselook?
The updated MTech driving arrangement supports handbrake-initiated drift while the mouse controls steering. Use A/D for the handbrake request.
Why can I not use Shift alone as the handbrake in mouselook?
It is not independently reliable in the LSL input system used by this vehicle. The supported mouselook mapping uses A/D.
Can I use M2 addons on the M3?
Use items specifically supplied as M2 / M3 compatible. Model-specific parts should only be installed through their supported workflow.
Where is the camera menu?
Settings → Camera, including turn left/right and other camera adjustments.
Does NOS refill automatically?
The installed recharge controller refills the bottle over time. The reference full recharge is about one minute from empty.
42. Final reminders
Drive with the car, not against it. RPM, braking, throttle control, momentum, gear strategy, steering, and traction work together.
For mods: Scale Normal (1.00) → Install Mod On → Install compatible parts → Settings → Reload.
For NOS: wait for full charge, use the assigned controller responsibly, and respect cooldown/recharge.
For cameras: all camera changes belong in Settings → Camera.
For RP: normal lock/access is separate from the RP Alarm, and MATRIX City rules still apply.
MTech M3 Competition
EROS Engine — Crafted with passion. Built for true enthusiasts.
Eros Mercury
Related reading: MTech M2 Full Vehicle Manual — the earlier manual on which the M3 family system was developed.